There are several different kinds of appliqué, but I (Kira - hi, hello, welcome) specialize in needle turn appliqué! So if that's what you're looking to learn, you're in the right place. If you want to skip the reading and go straight to the video, head to the bottom of this post!
For the sake of not making this the longest blog ever, we're going to assume that you already have the basics of hand sewing down. If you've never sewn anything before that's okay (I'm honored you've chosen to start here!!), I would recommend looking at these posts first:
P.S. if you'd rather skip all of this and just get everything you need in a craft kit - you can get those here. It walks you through the project start to finish and there are designs for complete beginners to advanced sewists.
1. Get Familiar with Some Sewing Terms!
2. How to Prep Your Needle for Hand Sewing
I will also link to other tutorials throughout the post for other things you may not already know how to do!
For this tutorial you'll need:
- A prepped/threaded needle - All-purpose thread and any standard hand sewing needle will do!
- Scissors
- Printer paper and pen
- Fabric marking tool
- Safety pin
- Fabric - 1 piece for the appliqué shape, 1 piece for the backing (size on both is up to you but you won't need a super large piece!) I recommend regular quilting cotton to start out.

Got your supplies together? Now we can get started!
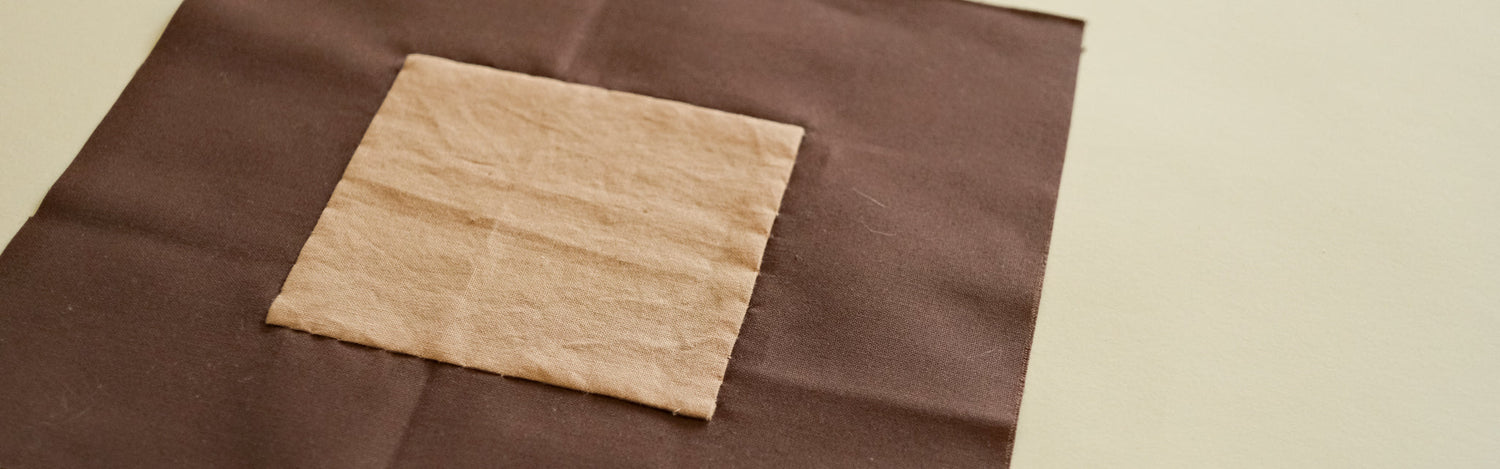
1. Make your template.
Needle turn appliqué relies on templates. Today we'll make the most basic shape there is to sew - a square! So grab your printer paper and cut a square from it. The size doesn't really matter but I would recommend sticking with something on the larger side (no smaller than 3"x3"), as small appliqué pieces can sometimes be more difficult to work with.

You may be wondering why we are doing a square instead of a circle, and while both are definitely beginner shapes, squares are easier since you don't have to make a smooth curve. If you want to learn techniques associated with slightly harder shapes, you can find those tutorials linked at the bottom of this page!

2. Trace your template onto your fabric.
Once you have your template cut out, we will put it on top of the right side of the fabric and use your fabric marking tool to trace around it. Leave yourself a small cushion of space from the edge of anything on your fabric though, as we will not be cutting the shape out on the line!

3. Cut out your shape.
Get your scissors and cut about 1/4” bigger than the line you just drew - this extra space is called a seam allowance.

4. Pin your appliqué piece onto the backing.
This step is about as simple as it sounds - pin the appliqué piece onto your backing with safety pins, making sure everything is nice and flat! If this isn't cutting it, you can also try basting it with thread to add a little more stability

5. Sewing on your appliqué piece.
I highly recommend watching the video at the very bottom of this post, as it is much easier to demonstrate than it is to explain in words.
Grab your prepped needle and bring it from underneath the applique piece to the top, coming up right through the line you drew when tracing the template.

Fold under the seam allowance and bring your needle back down through the backing fabric and then straight back up through the edge of the appliqué piece, about 1/8” away from where you went down.


Continue all the way around the appliqué piece, sewing on the line you drew.

Once you get to the end, simply tie off your thread. To do this, take the needle through a small bit of the backing and create a loop with the thread.

Run the needle through the loop twice and pull to form a knot.

Insert the needle into the backing, coming out through the other side, snip the thread so the tail is on the back, and you're done! Just like that, you know how to do needle turn appliqué.


If you have any questions at all, reach out via email: hello@itsallinthestitch.com
If you want to try a pattern - head here. There are even some free beginner ones!!
If you want to learn techniques associated with slightly harder shapes, head to one of these posts:
Needle Turn Appliqué Techniques: Curves
Needle Turn Appliqué Techniques: Concave Points and Curves
Happy sewing!!
1 comment
Love your tattoo!